Recently, I needed to replace a very specific connector for my computer. The connector in question, as well as the process I underwent to replace it is documented here.
One part of the process required me to get measurements for various parts of a cable connector, so that I could accurately ID the part.
The only known value I had was a reference size within the picture, but I needed to know the connector’s pitch (the distance between each of the pins/sockets), its width, & its height.
I made a post requesting a picture of the connector, with a reference object, and recieved a helpful reply:
yeah yeah, my phone’s camera suck 🙄
Is this what you wanted?

The commenter offered to help me out with calipers later, but this quick picture on their bad phone camera actually gave me everything I needed.
The only thing to figure out was how to turn this tiny picture into an accurate reference image.
There are plenty of tools/apps that advertise themselves as doing this, as well as plenty of online options, but I didn’t find anything particularly good for free, and already had GIMP installed.
What you need
- An image containing the following:
- One or more elements with unknown dimensions, that you want to measure. Lets refer to these as “unknown lengths”.
- One or more elements with a known dimension.
Let’s refer to this as our “reference length”
- Good examples of objects with a well-known dimension might include:
- A coin in your local currency
- A ruler
- An A4 sheet of paper
- AA battery
- Good examples of objects with a well-known dimension might include:
- The free, open-source software GIMP
- GIMP can more or less be described as the “FOSS Version of Photoshop”
- It’s a general purpose image manipulation program, and its uses range from retouching photos, to producing original art, to almost anything else you can imagine.
Some terminology
- Pixel
- A pixel is a single coloured dot in an overall image. All of the pixels combine to form an overall image.
Measuring your object
To measure the unknown lengths, we’ll first need to use our reference length as a frame of reference for the overall image, and then we can apply this frame of reference to the individual elements.
In my example, I know that the:
- smaller divisions in the grid in the picture are 1mm,
- the larger divisions are 10mm or 1cm.
These are my “reference lengths”.
I will refer to the 10mm divisions as Ref
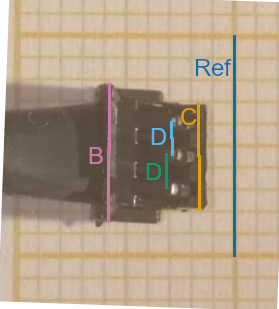
- I know:
Ref- the 10mm reference grid
- I want to know:
B: the width of the connector at its baseC: the width of the connector at its tipD: the distance between each pin, or the “pitch”
Applying your reference length to the image
Use the measure tool
We’re going to start by importing our picture into GIMP, and then we’re going to select the “Measure” tool (Looks like a protractor)
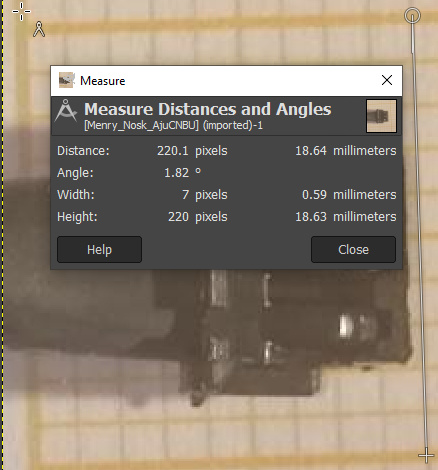
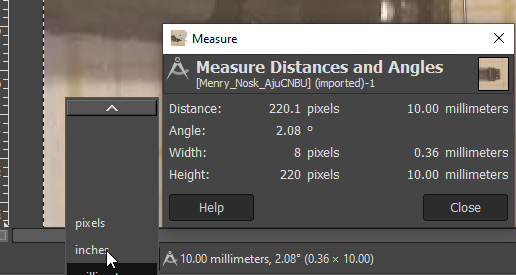
Measure Reference in pixels
Measure Ref in pixels. Notice that the “millimeter” reading is very wrong -
that’s okay, GIMP just doesn’t know the correct ratio between pixels <=> mm yet.
Now we know how many pixels 10mm corresponds to, we can adjust a setting so that GIMP also knows.
Adjust the print size
Click Image > Print Size in the top bar:
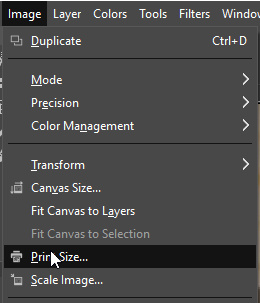
The “Print Size” dialog let’s us set the size in terms of pixels/unit.
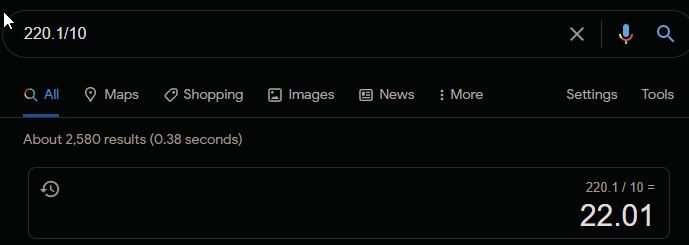
Calculate ratio between pixels and real-life length
Our unit is mm, and we know that 220.1px corresponds to 10mm.
That means that 220.1px/10mm => 22.01 px/mm.
I used google as a calculator to divide by 10. Please don’t judge me.
Set the print size
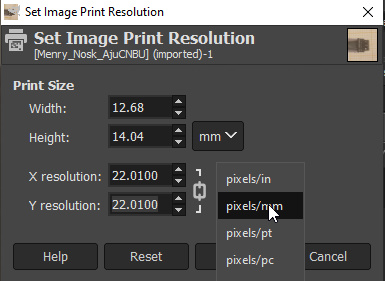
Press Okay, and you should notice that now the measure tool will start reporting
accurate lengths in “millimeters”.
At the bottom of the screen, choose “millimeters” (or whichever unit you’re using) for the reference unit.
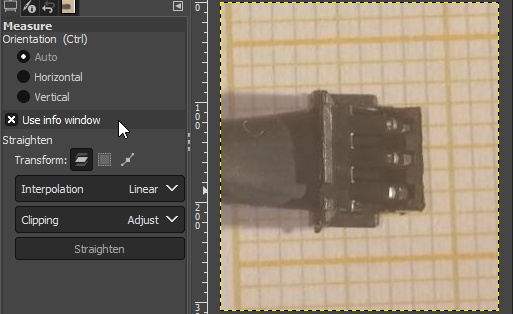
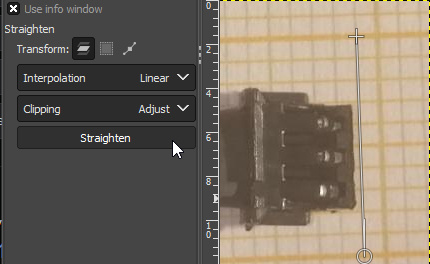
(Optional) Align the image with reference length
Finally, if we want to, we can Use the measure tool’s “Straighten” button to align our image with the line we used to measure. This may or may not be useful for you.
Measuring your lengths
Now that GIMP knows what a given length in pixels on our image corresponds to in real-world lengths, measuring a given dimension becomes easy.
We use the measure tool again.
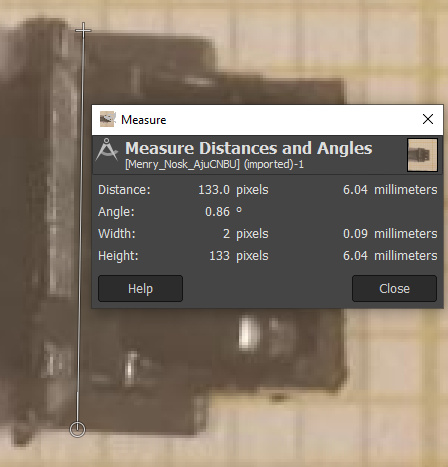
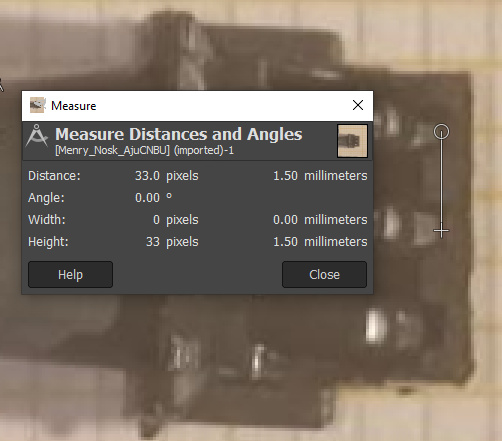
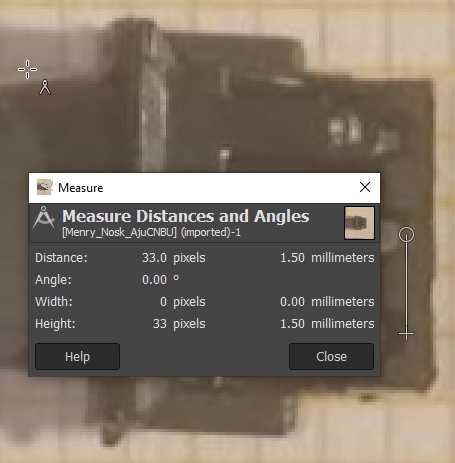
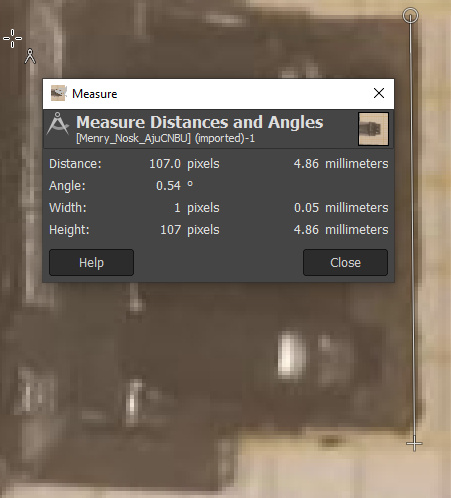
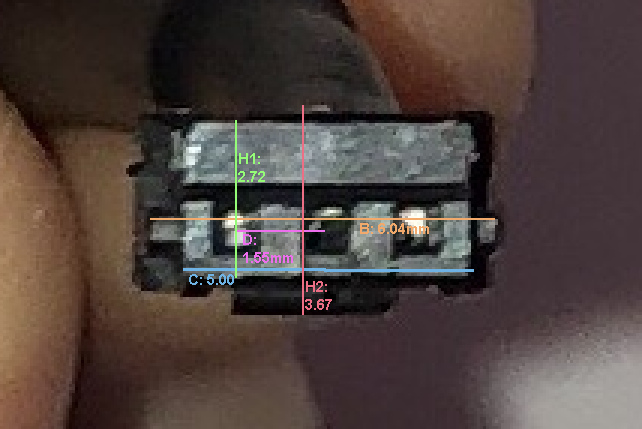
We can see the following:
Ref=10.00mmB≈6.04mmC≈4.9mmD≈1.5mm
Using our Measurement
Let’s see if we can find a product that matches up to this:
I have the feeling that the connector I’m looking at is a JST product.
From their product overview document- I find a shrouded header that looks like the one I want with the same pitch as mine:
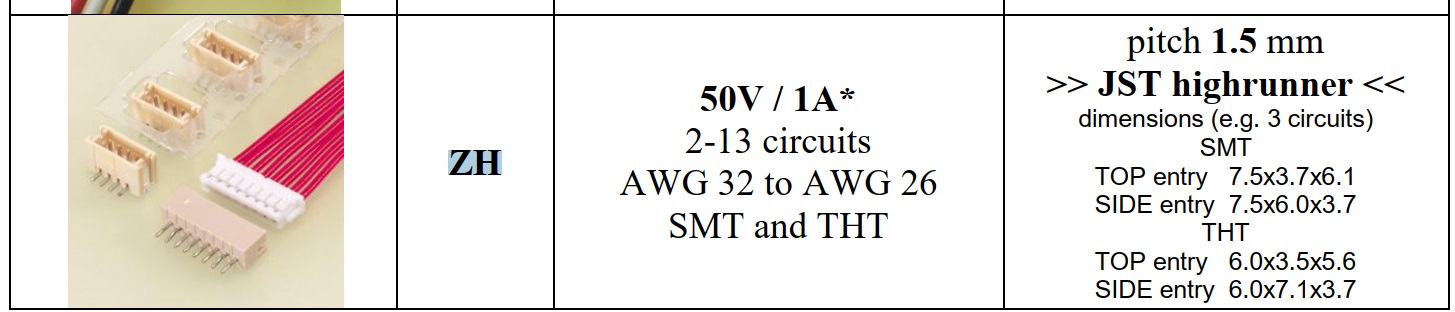
Product overview entry for JST ZH
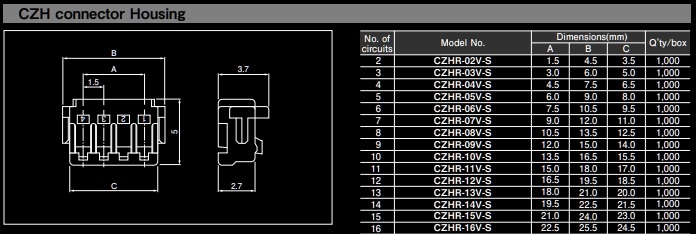
Datasheet entry for JST ZH
We see that for our pitch, & dimensions, this product appears to match up.
Applying the same technique to a front-on image of the connector suggests that we are correct: